Molding Plastic at Home
3D printing plastics has revolutionized prototyping. Literally, you can design anything you want and have it printed in minutes. I think we've forgotten how Sci-Fi this is: if someone sees this for the first time, they'd be blown away, and I've often had the pleasure of seeing people's reactions.
But no matter how good printers have gotten, there are some limitations. One is that with regular FDM 3D printers that most of us use, the parts printed are not isotropic: since they form the object layer by layer, their material properties are not uniform in all directions. The fusing of the layers is never perfect, and some materials even leave microgaps between the layers, making them not air or water-tight. Yes, SLS printers do print isotropic parts, but they're too expensive. Further, some very common plastics that we use in everyday life—like HDPE (High Density Polyethylene) and PP (Polypropylene)—can't be easily 3D printed because they shrink a lot after cooling and don't stick well to print beds.
You also have desktop injection molding machines these days, but they're still expensive and complex to handle. Plus, the molds have to be CNC machined, and I wouldn't call that a basic maker tool.
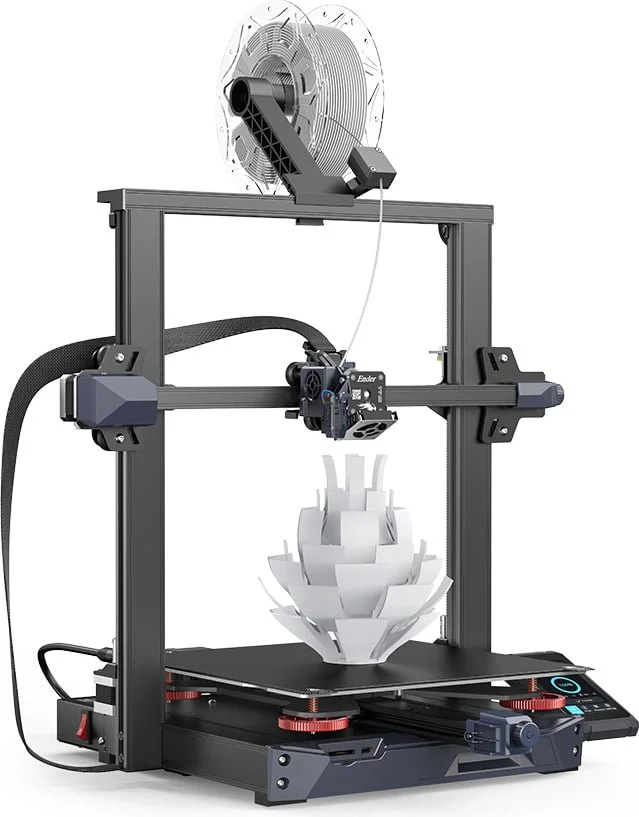
Excellent 3D printers cost less than $150 these days
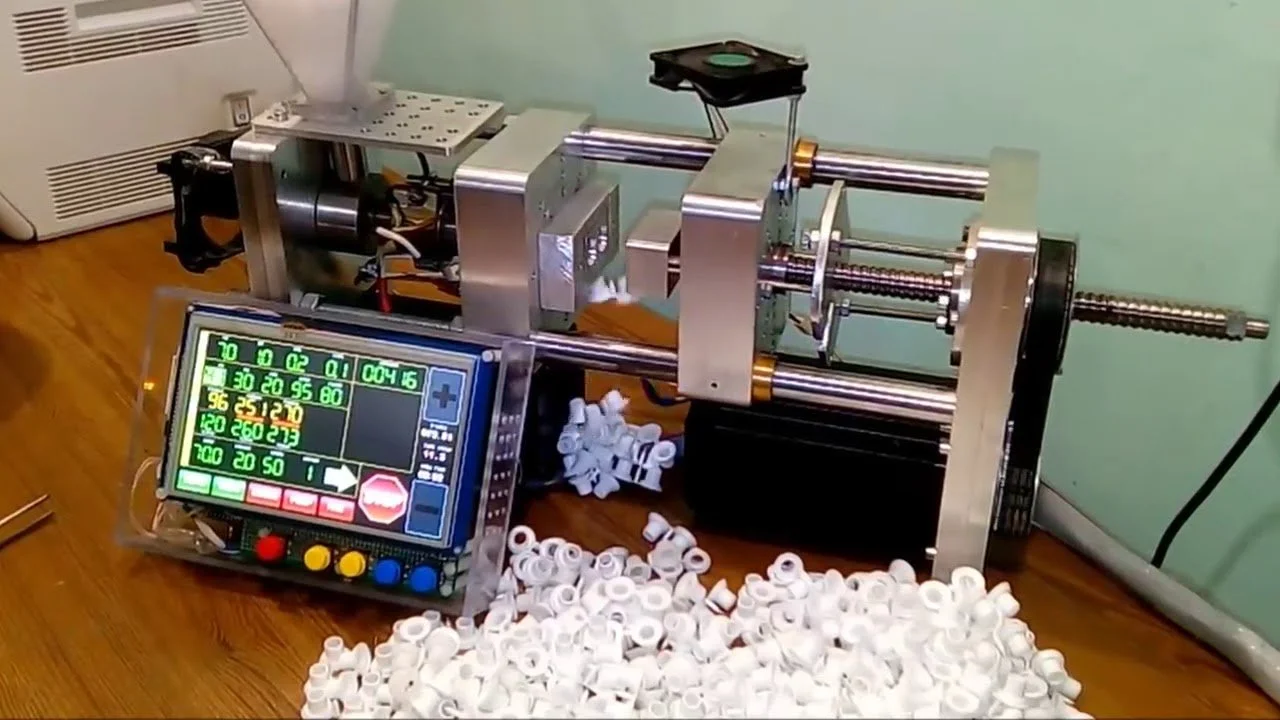
A desktop injection molding machine
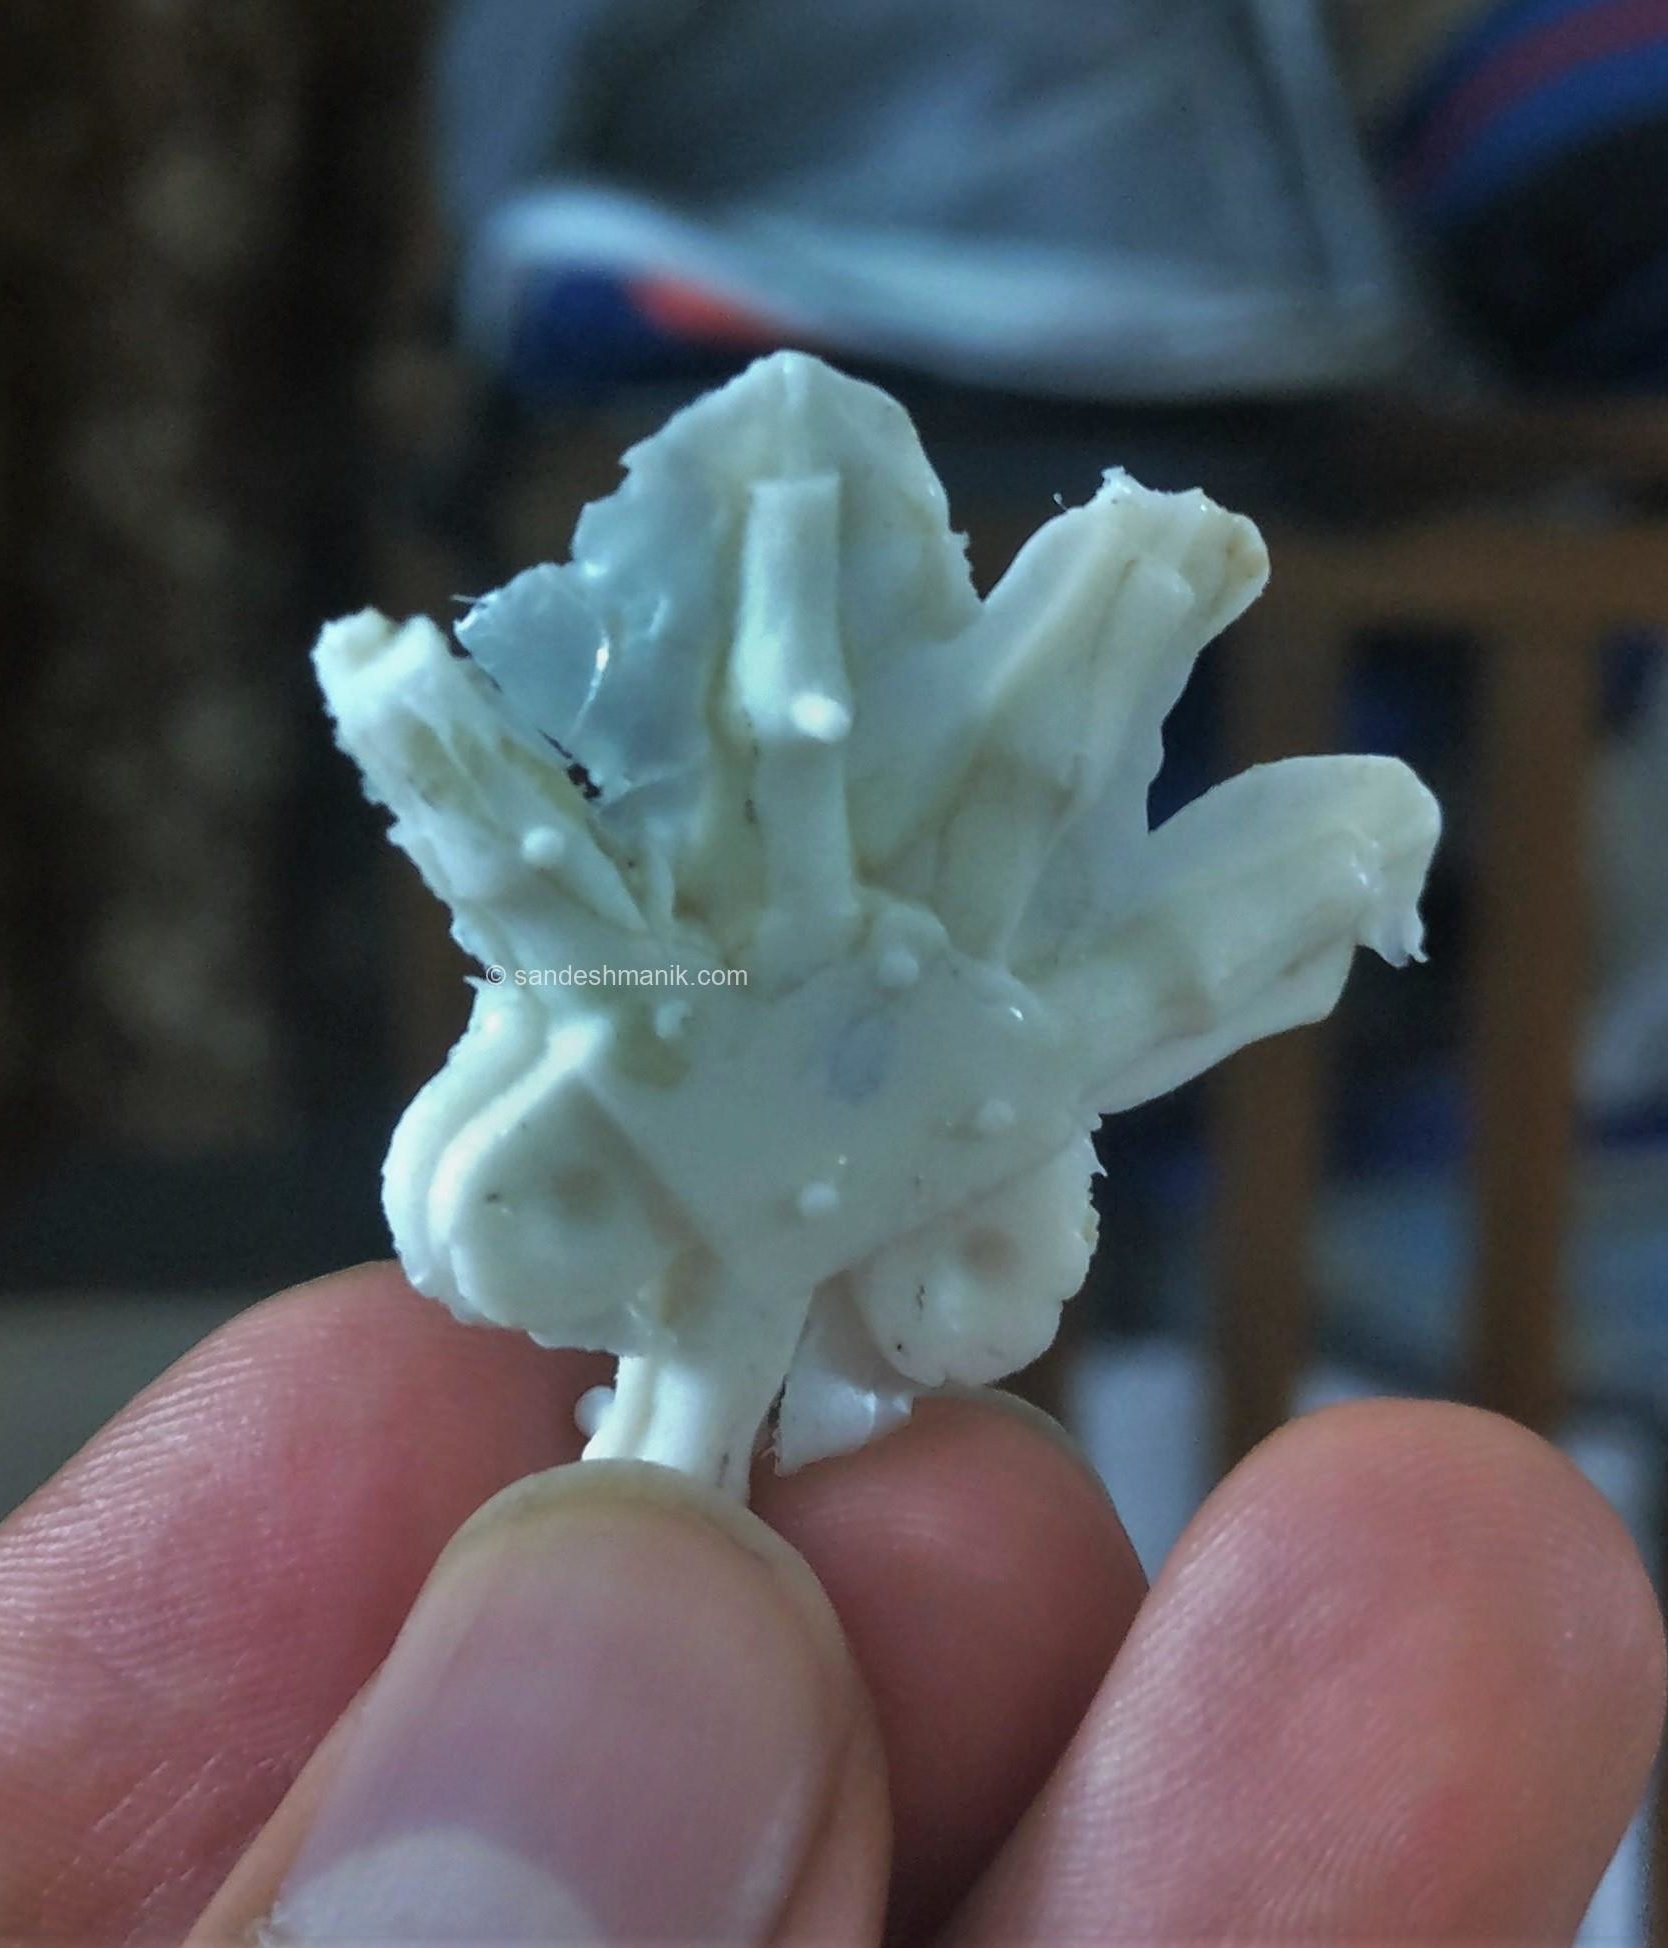
HDPE molded at home
Why mold plastic at home?
The solution I came up with uses a basic 3D printer and some everyday materials to mold your own plastic parts in a kitchen oven. It combines some principles of plastic injection molding and metal casting. People on the internet have tried versions of it before for very simple and big parts, but I designed this for slightly more complex water and air-tight parts I needed for a personal project. This method to mold plastic is for makers working with basic tools—which is most of us anyway—so I thought it was worth sharing.
What Kind of Plastic?

Household containers made of HDPE
Here I'm using High Density Polyethylene (HDPE) that I'm recycling from food containers. It's one of the best plastics for handling water and chemicals, and is extremely hard to 3D print with since it shrinks and warps so much on cooling. But honestly, any thermoplastic would work as long as you know what it is so you know what temperature to set for the oven. Thermosets like epoxy won't work since they're chemically cross-linked and can't be re-melted, but most common household plastics (HDPE, PP, PET, etc.) are thermoplastics and will work fine.
The Process
The process is simple: you make two hemispheres of the mold out of plaster that are shaped from 3D printed negative molds. The plastic is then melted in each mold separately in a kitchen oven. The plaster molds are not affected by this temperature. Once it's fully melted, the two molds are joined together to let the two hemispheres of plastic fuse under heat and pressure. Here's the process step by step:
Making the 3D Printed Patterns
First, design the part you want to mold in your choice of 3D modeling software. It's good to follow injection molding design guidelines when possible—like keeping wall thickness as uniform as you can so the plastic cools evenly. Uneven cooling causes warping and internal stresses since thick sections shrink slower than thin ones.
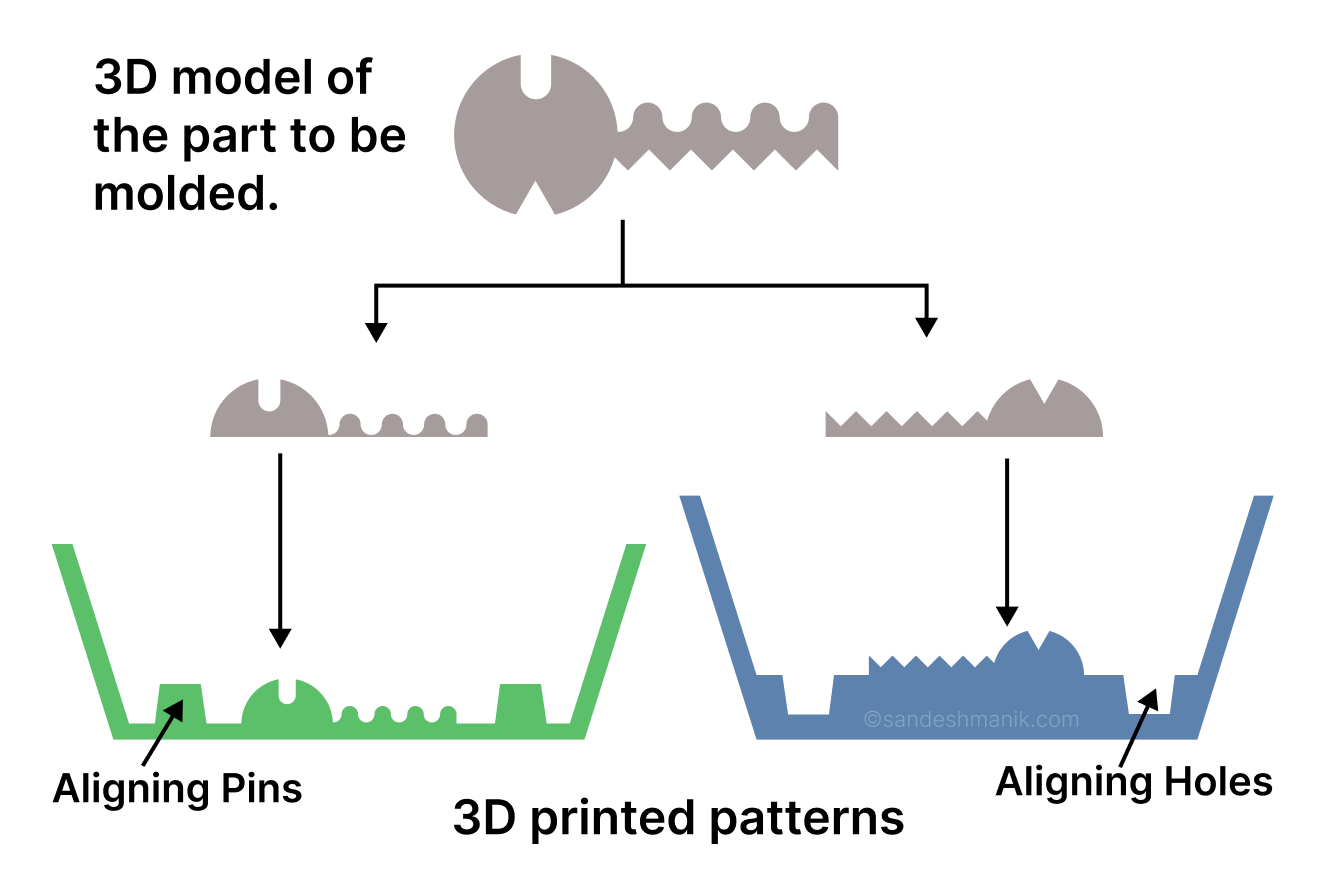
Then split this model into two halves in the most logical way so that the final molds can actually be separated. Now design the two halves of the patterns—these are what you'll 3D print and then pour plaster into it to create the actual molds. I added alignment pins and matching holes on each pattern half so the two plaster molds automatically lock into perfect alignment later. Make sure you give draft angles so that the plaster mold can be pulled out from the 3D printed patterns once it's set.
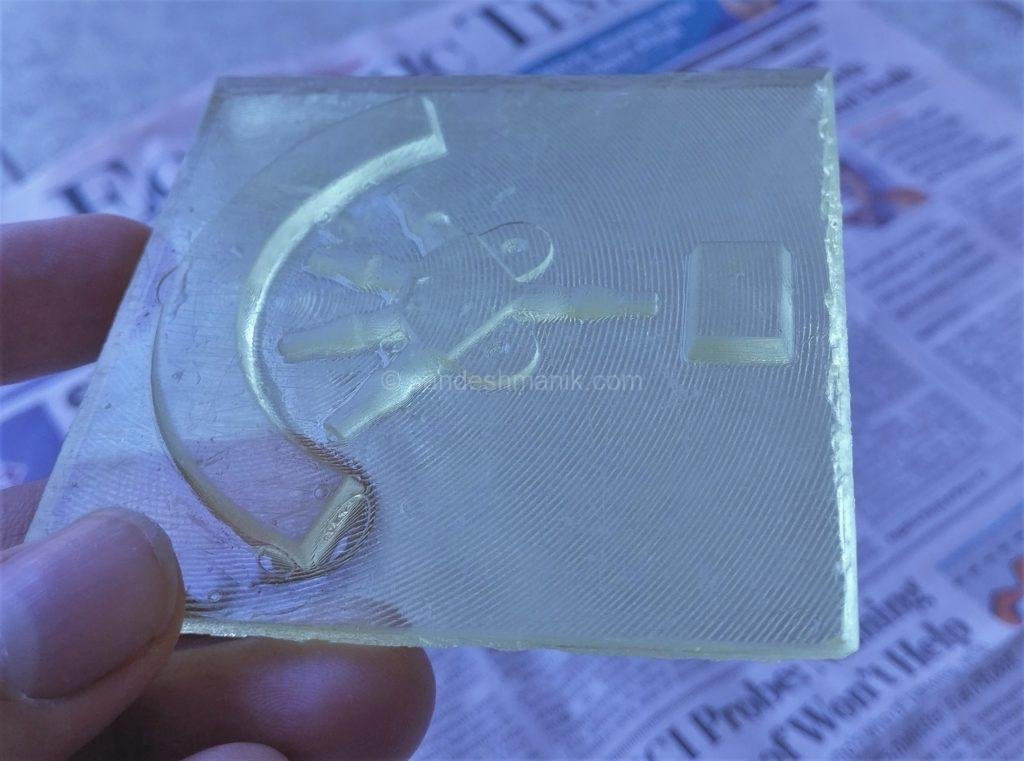
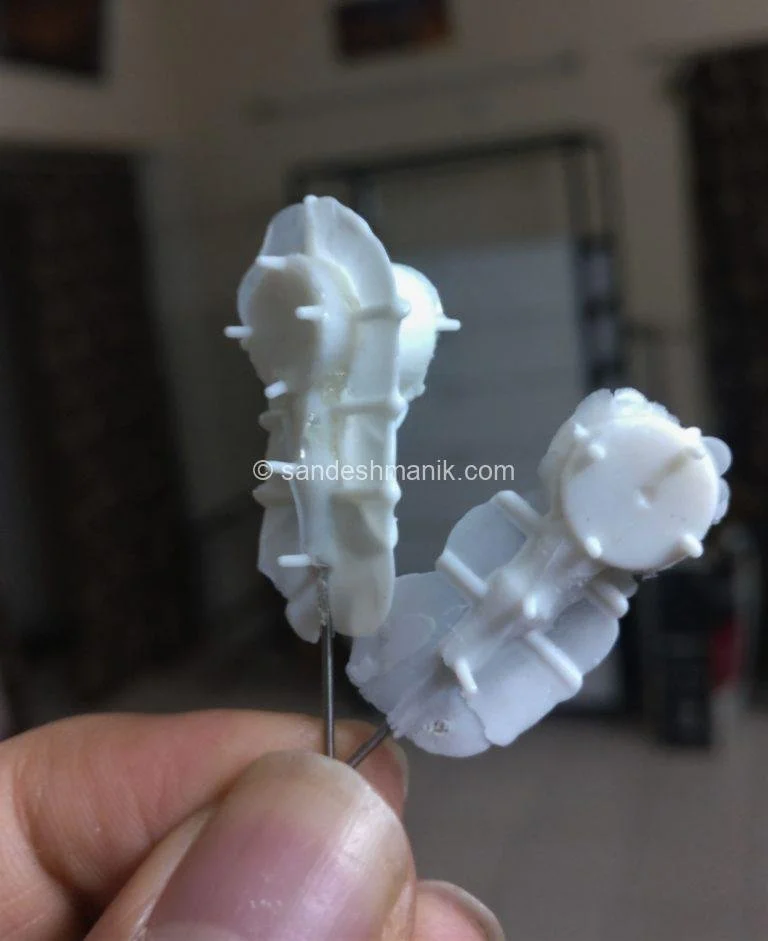
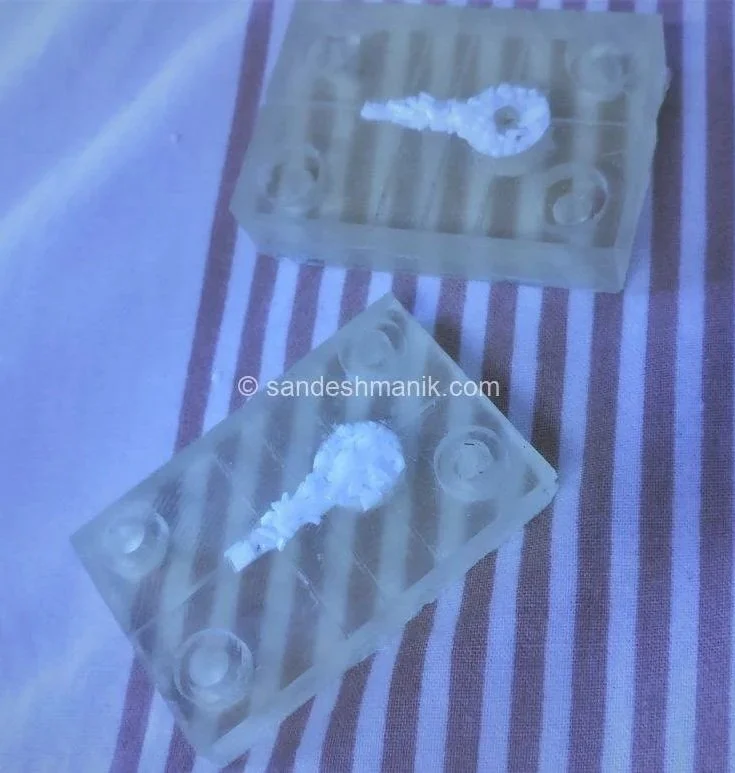
A 3D printed pattern. (This was an SLA print, hence the transparent color. You can use any printer for th)
2. Making Plaster Molds

Pouring plaster into the patter
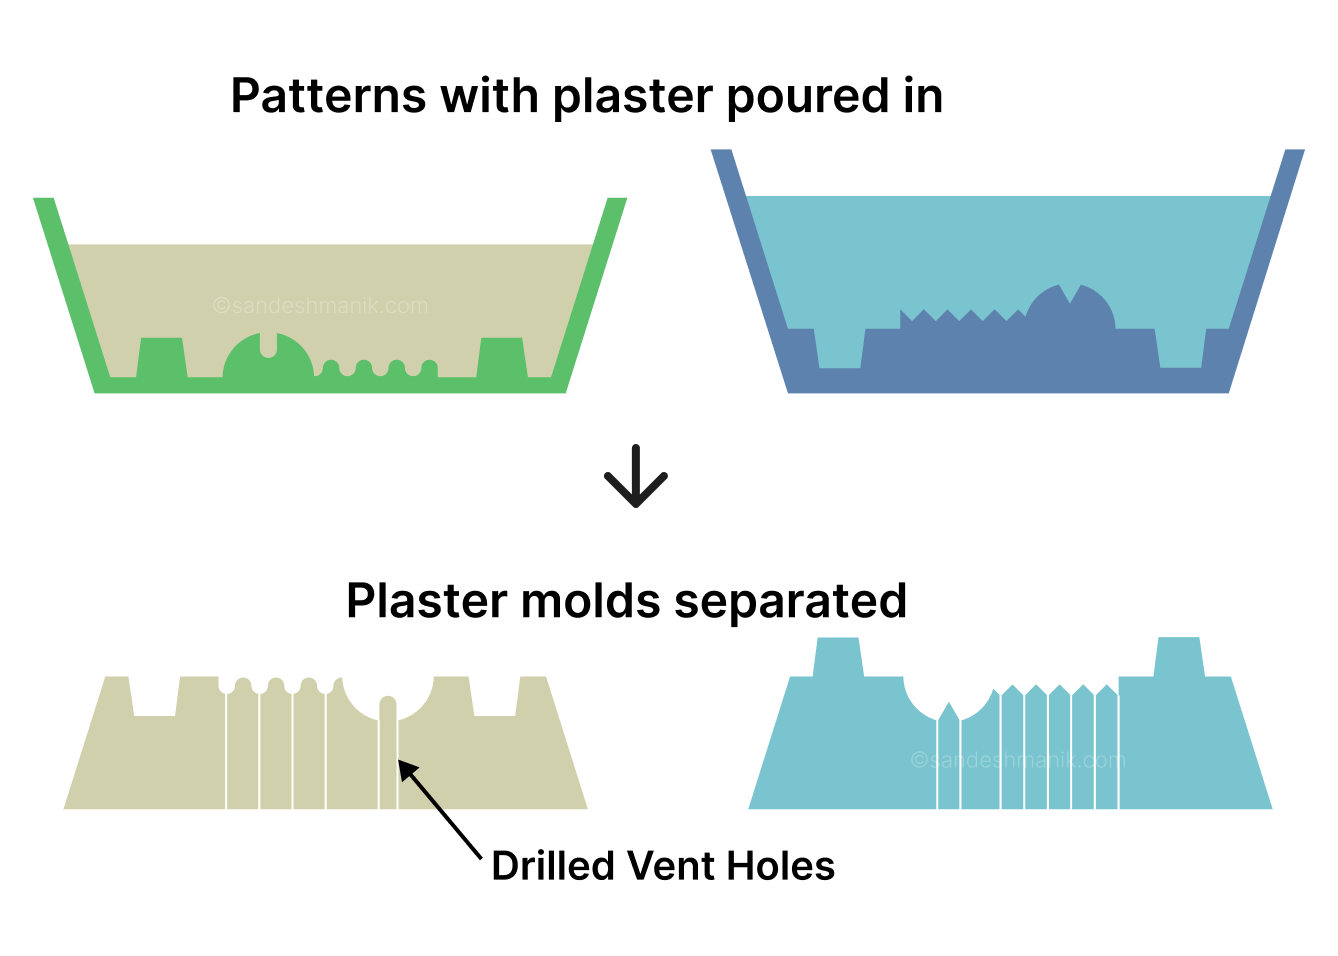
Now pour plaster into these patterns. Be careful about filling the smaller details and cavities. Some people might use a vacuum chamber to remove any air bubbles trapped inside, but I think tapping the pattern after filling is good enough to work out the bubbles. Make sure the plaster is thick enough (at least an inch or so) so the final mold is rigid and won't crack.
Once the plaster is properly set, gently remove it from the pattern—make sure none of the fine details break off. After removing the plaster mold, you can create tiny vent holes in cavities where air could likely be trapped during molding. I use a 1 mm drill bit to make these holes.
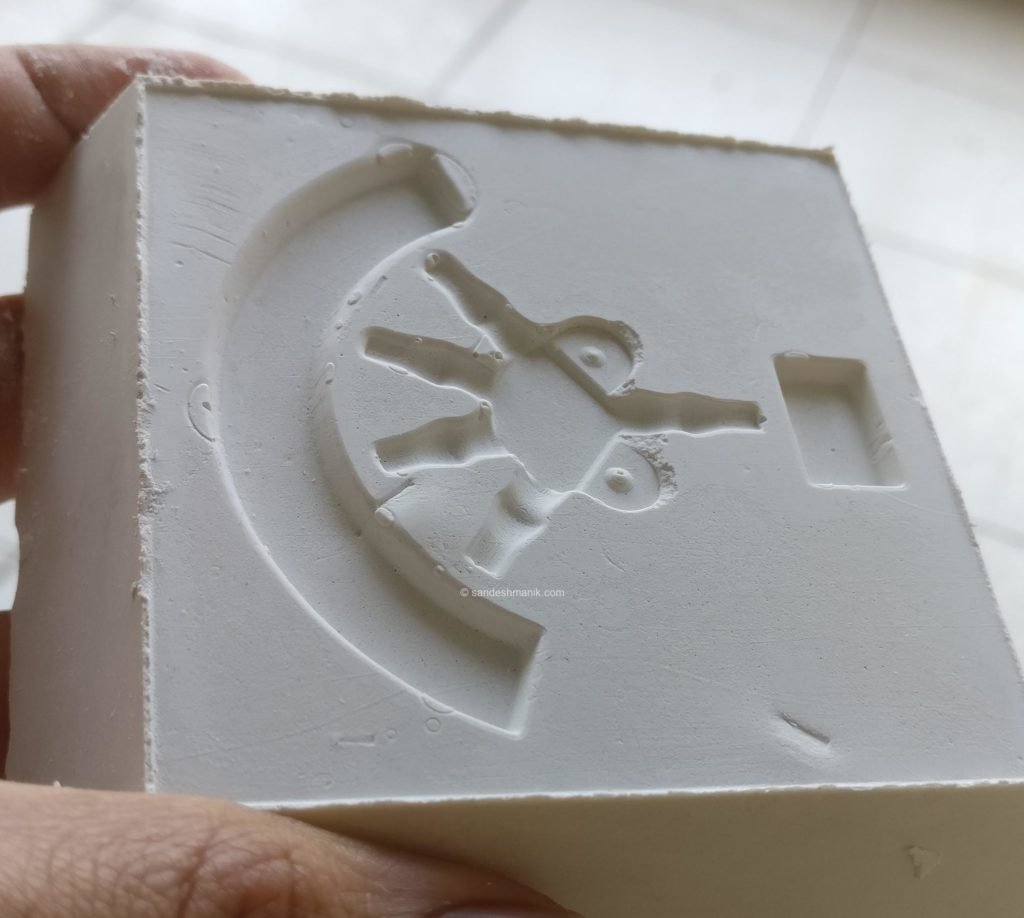
Plaster molds after setting
3. Preparing the Plastic
Liquid plastic isn't like liquid metal—it doesn't flow as easily because it's extremely viscous (about 1000 times). This is why we can't just heat the plastic separately, melt it, and then pour it into the mold like you would with metal. Injection molding overcomes this by applying thousands of PSI of pressure to force the plastic to flow into the mold. In our case, heating it in the mold itself gives us an advantage—the plastic melts in place and already roughly takes the shape of the mold cavity.
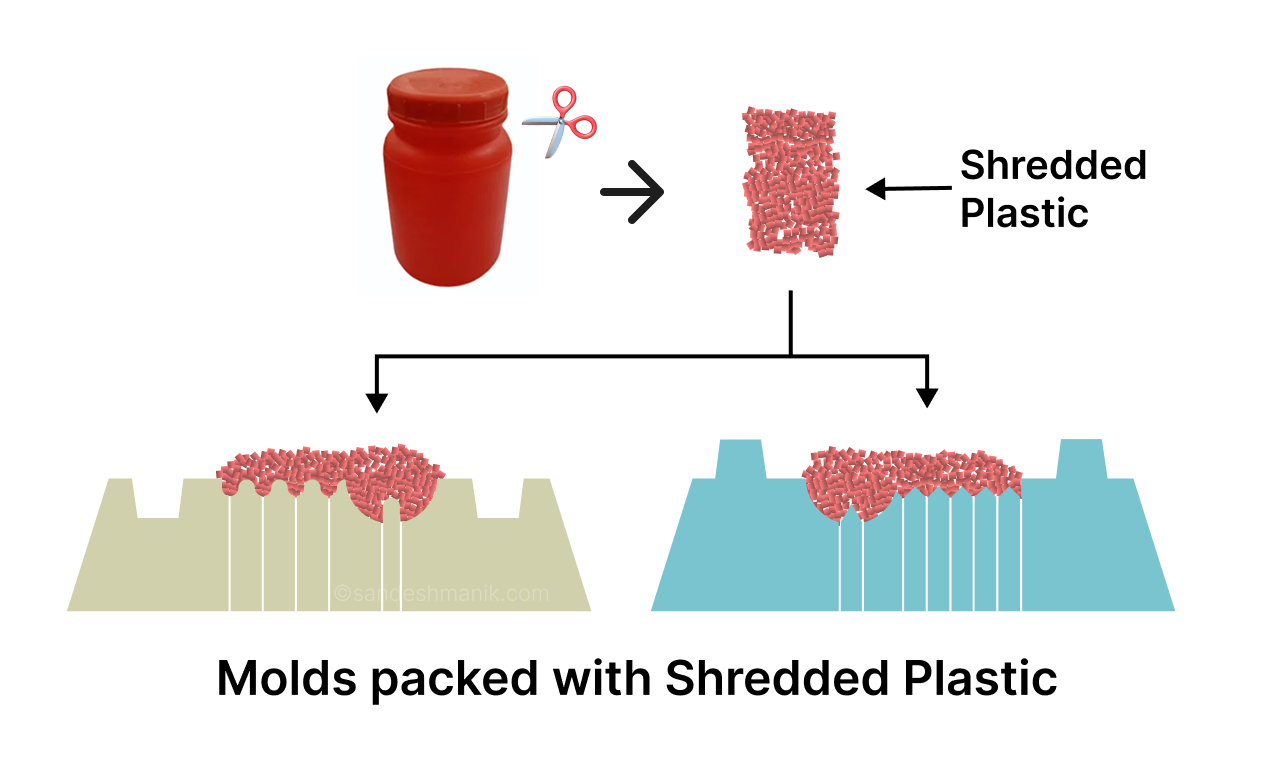
Start with shredding the plastic into tiny bits (I just used scissors). Since the oven heats by convection, shredding the plastic gives it more surface area to melt in less time. Also, the smaller bits fit into the crevices of the mold much more easily, so when they melt, they're already in place rather than having to flow there under pressure that could ruin the plaster mold.
Now, pack the shredded plastic into both the molds, making sure the deeper and narrower cavities are filled too. Try to pack it tight without damaging the mold details, and put at least 25% extra plastic, heaping as much shredded material as you can. Once it melts, all those individual pieces will fuse together and the air gaps will collapse, so you need way more shredded volume than you'd expect. It is completely fine if the mold is overflowing after it melts, in fact we want to see that to be sure there’s enough plastic for the part itself.
4. Melting the Plastic
With the plastic packed in the cavity, it's time to place it in the oven. This part requires some trial and error. Let's stick to HDPE for this example, but all thermoplastics behave similarly. Technically, HDPE melts around 130°C, but as the temperature increases, the viscosity decreases, so it flows better—and you want that so the plastic expands into the mold more easily. In fact, at 130°C, the shreds won't even fuse together without external pressure.
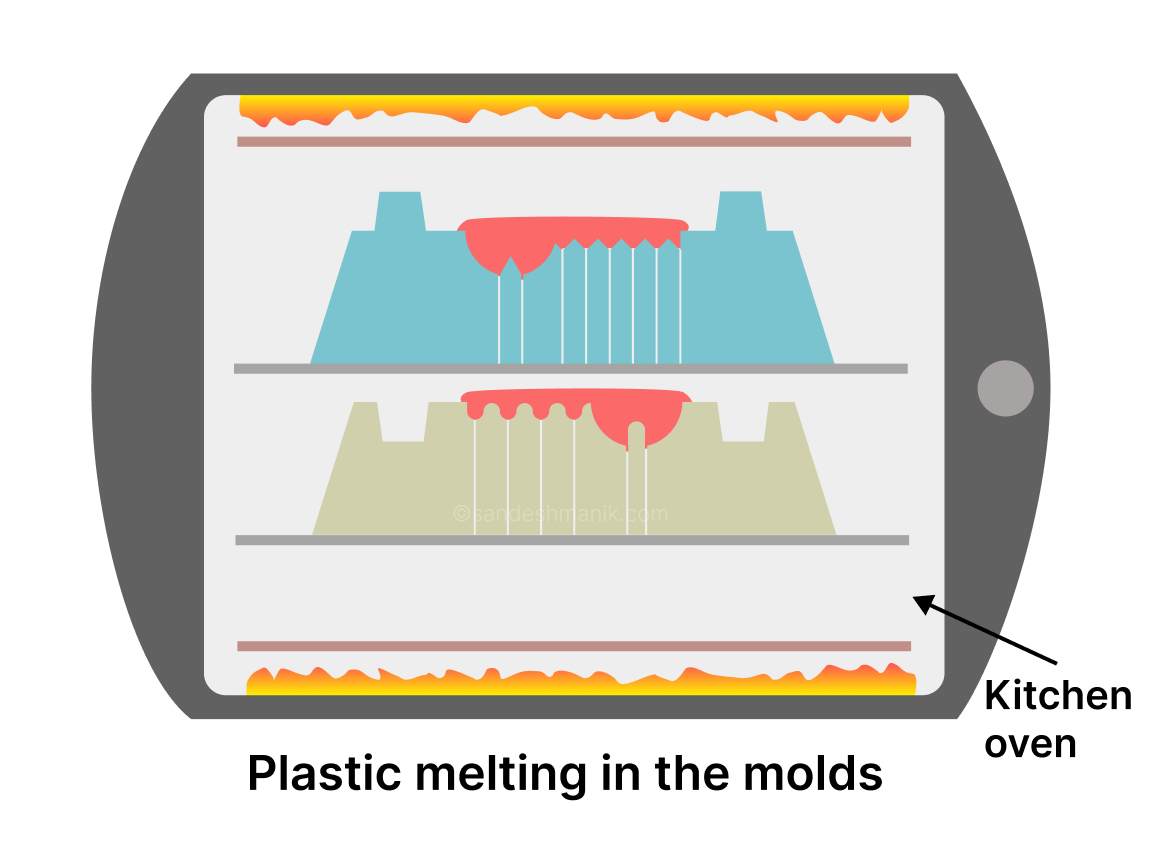
The plastic keeps becoming more liquid-like as you go higher—up to around 280°C—but at some point (starting around 190°C), it also starts oxidizing in the air, and you'll see browning over time. I've found around 200°C to be the sweet spot: hot enough for the shreds to completely fuse under their own weight without browning too quickly, but it may take a couple tries for you. Just experiment with some test batches of shredded plastic to dial it in.
Place both molds in the oven and wait for the plastic to melt. You'll visibly see the shreds fusing into one big blob. Let it stay for a while to make sure all the shreds beneath the surface are also fully melted and fused. Keep monitoring to make sure there's no browning.
Since you're not burning the plastic, there won't be significant smell. There will be some fumes, but they're not bad at hobby-level as long as you have ventilation in the room. Make sure there are no toxic additives in the HDPE you're using (especially if it's recycled HDPE from non-food containers).
5. Fusing the Plastic
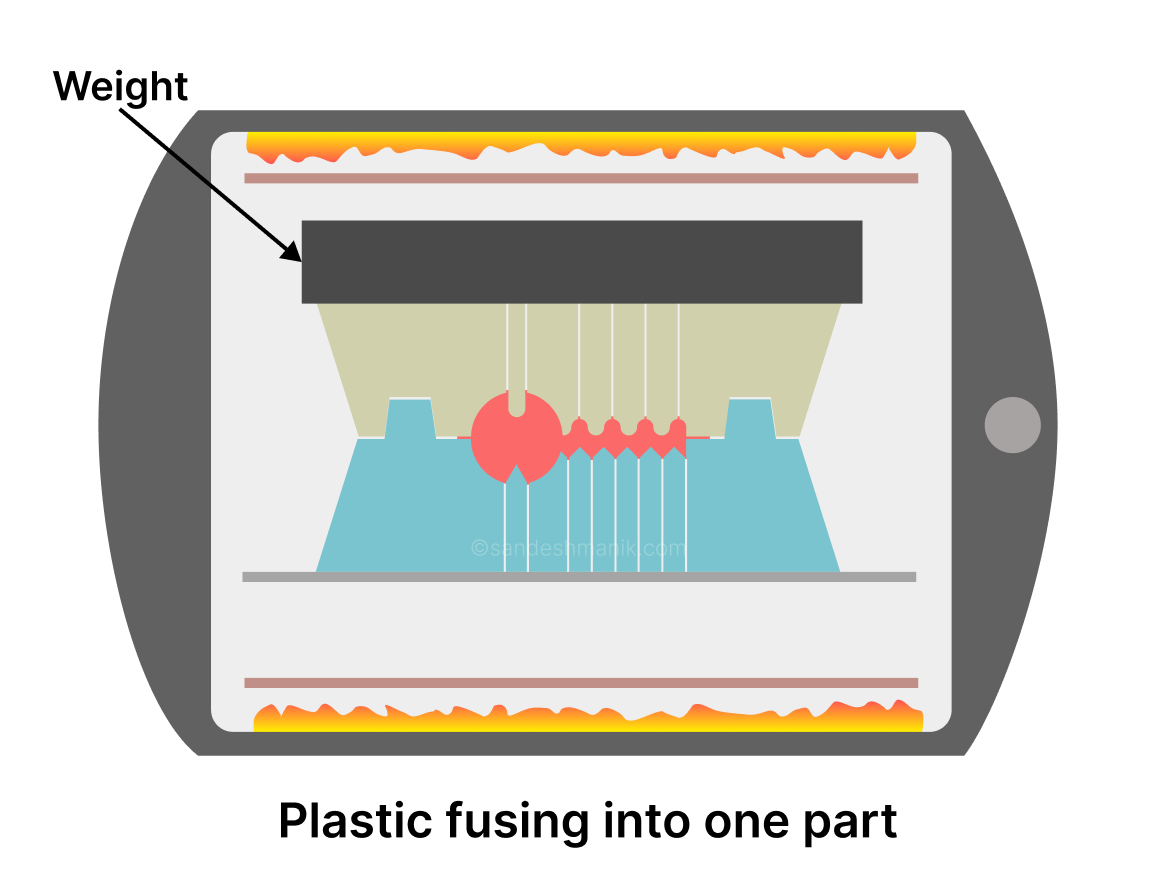
Now that the plastic has melted in both molds, it's time to fuse the two halves so they become one single part. This might be the trickiest step, and it has to be done quickly. Be careful—you're handling hot things. Wear heat-resistant gloves for proper dexterity, not kitchen mitts!
Carefully take out the two molds and join them. The alignment pins and holes will guide them into place. Be gentle—don't force it too much. Work fast here: once the molds are out of the oven, the plastic starts cooling, and if it gets too cold, it won't fuse properly. You'll feel the plastic blob squishing as you press the molds together, and sometimes it'll even ooze from the gaps and vents. Just push them closed as much as you can with your hands while being gentle.
Once you put the joined molds back in the oven, the goal is to make sure both plastic halves fuse completely. This is also when the plastic properly flows into all the mold cavities under added pressure. The weight of the mold itself isn't enough to create pressure, so you should place a weight on top to apply constant force as the plastic continues heating. A steel block works perfectly for this—it's dense and this level of heat won't affect it. Leave it in for a few more minutes to ensure proper fusion.
6. Retrieving your part
Switch off the oven, open the door, and let the part and the entire setup cool down before you touch it—much easier that way.
Once cooled, take out the setup and gently pull the plaster molds apart. You can totally use force and break the mold to retrieve your part, but if everything goes well, you can reuse the same mold to cast another part—just make sure the mold details stay intact.
Examine the part for any defects. Of course, there will be protrusions where the mold halves met and at the vent holes, which you can easily trim and sand off. You can even use a Dremel for more details or drill holes if your mold pattern couldn't capture tiny features. But there you have it—a molded plastic part made at home, whenever you need one!
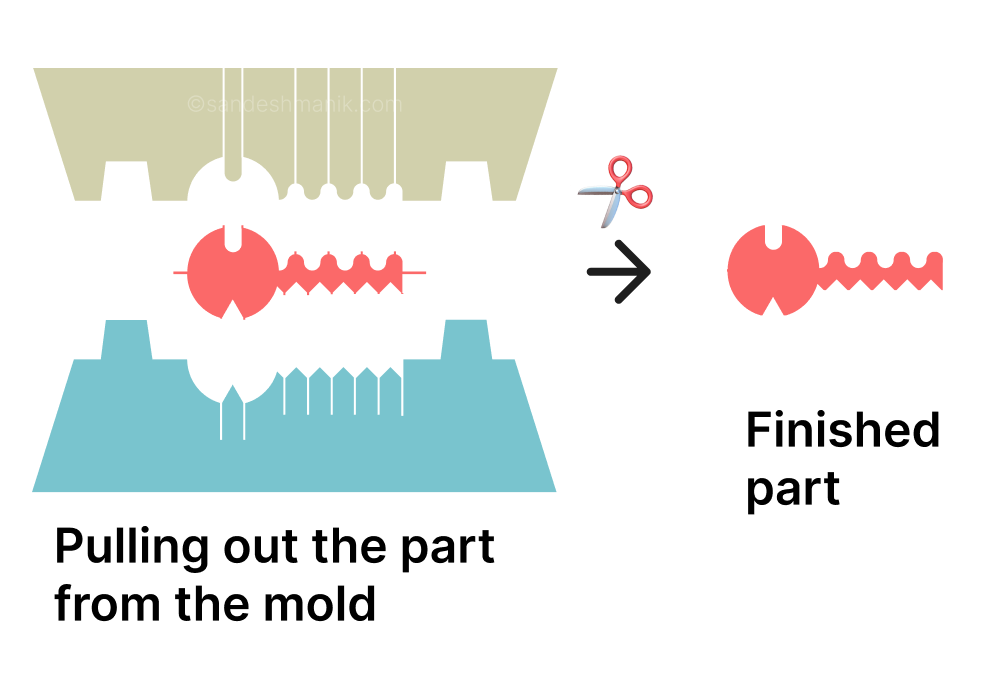
The pulled out unfinished part
Failed Experiments
You can get SLA printers pretty cheap these days—they're the ones where you pour resin and a UV projector cures it layer by layer. They're not meant for functional parts because the resin is quite brittle, but they give you much finer details and are suitable for some applications.
Since SLA resin can handle higher temperatures than typical 3D printing filaments, I tried using resin prints directly as the mold instead of making plaster molds. It does work sometimes, but the resin gets super brittle when heated and the molds often warp or crumble—not consistently enough to be reliable. The plaster approach ended up being more repeatable.
Packing the resin molds
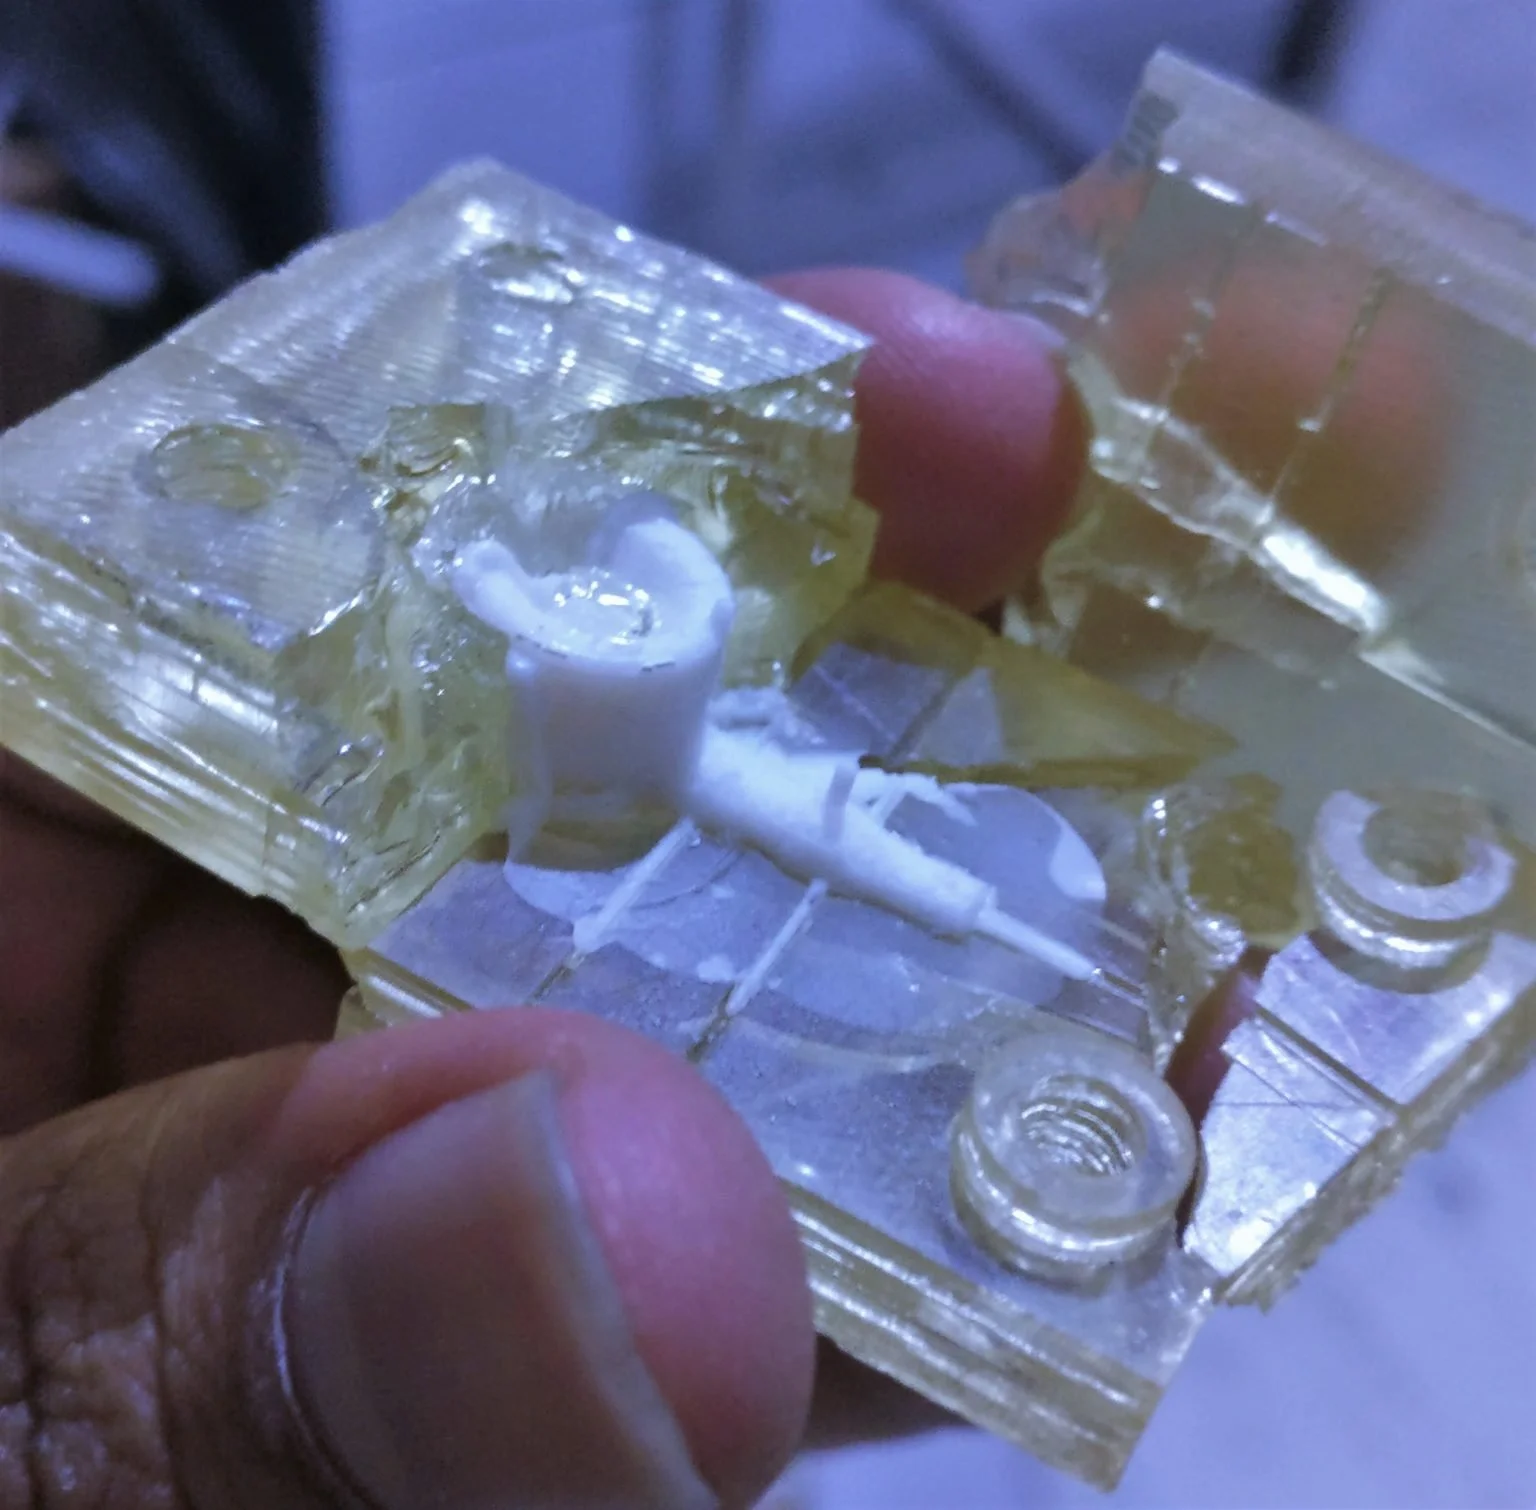
The part got molded successfully but the mold broke
If you've tried a different approach or have ideas, I'd love to hear about it!